
Three Gaia GPS Map Overlays For Your Next Adventure
- Ben Easley

- May 9, 2023
- 5 min read
Updated: May 11, 2023
In case you hadn't figure this out, Gaia GPS is our go to mapping application for developing new routes, as well as our primary mobile app for exploring the backcountry. There's certainly some great alternatives out there, but when it comes to providing a deep trove of basemaps and map overlays, Gaia beats the competition hands down.
In this article we'll touch upon three different map overlays that can aid in successfully planning and navigating your next overland adventure. Our go-to basemap in Gaia these days is definitely the Overland basemap, which has all kinds of useful information specific to folks traveling the dirt backroads and trails, like you and I!
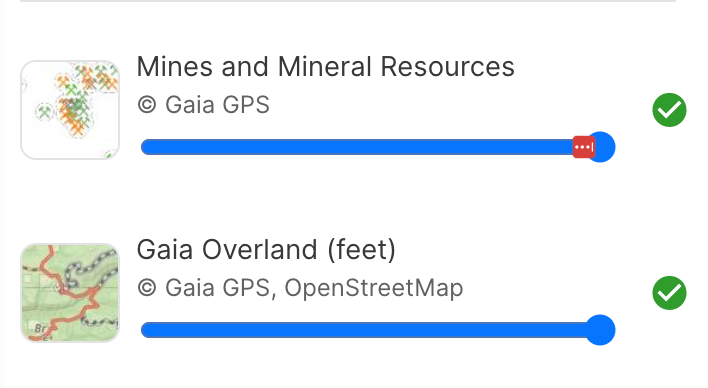
How Overlays Work Gaia's Overlays do exactly as the name suggests, they create an overlay on top of your basemap. You can view a basemap without any overlays, a single overlay, or you may select multiple overlays at once. From a user experience perspective, we prefer using a single overlay so as not to create a confusing array of data on the screen.

First, make sure you have a basemap selected (Gaia Overland is the basemap in our screenshot). Then all you need to do is drop the map overlay above your basemap. If you put it below your basemap, it won't be visible, as the basemap obfuscates the view since it's now the top layer.
Wildfire (US Historical) Living in northern California, we rely on this layer rather frequently given the number of large forest fires

that have hit the state, and the entire West over the last several decades. Once you place the overlay above your basemap layer, you should see a number of red polygons of varying shades (at least if you leave west of the Rockies this is what you should see!). Brighter red indicates more recent fires, while lighter shades of red and grey are indicative of older fires. Pro tip: Gaia provides map legends for various map layers and overlays.
Click on a red polygon to reveal additional data about the fire, including the Fire Name, Year, and acres burned. One thing to note about forest fires, is they tend to burn the forest with varying degrees of intensity. Based on our experience traveling the burn zones of some of

California's largest fires, we've seen sections where all that remains are the charred trunks and branches of the pine forest, while other areas are lightly burned, and then islands of green that managed to completely escape the wrath of the flames. How to Use the Wildfire (US Historical) Overlay Last Summer we visited Lassen National Forest and Lassen Volcanic National Park. In case you hadn't heard, the Dixie Fire ravaged this part of northern California in 2021, burning nearly 1 million acres. We'd identified a beautiful campsite next to a meadow off of the Lassen Backcountry Discovery trail that we wanted to use as our basecamp. Easy enough-- we loaded our route into Gaia and then pulled up the Wildfire Overlay to see if our campsite had been impacted by the Dixie Fire. We were lucky, our campsite, and pretty much all of the dirt roads and trails we planned to explore were several miles west of the Dixie's burn zone. When traveling through burn zones, we'll also use Gaia in conjunction with Google Earth before heading out (be sure to check when the map tiles in Google Earth were last updated). We'll use Google Earth to get an idea of how damaging a particular fire was in a specific area. If all you see is black and no green, you're likely looking at a zone that burned incredibly hot. If you see patches of brown and green, this typically indicates a lower intensity burn, where many trees and foliage were able to survive the fire.

This screenshot above is from the Mendocino National Forest shows a low to moderate intensity burn zone. We see some brown, but also plenty of green. One of our campsites is found adjacent to the dirt road, and is still rather pleasant as the majority of trees are alive and well.

Snow Depth Layer (NOAA)
We try to provide a general timeframe/season as to when a given route is accessible by vehicle. One of the most common impediments we hear about is snow, especially when traveling high altitude routes in locations like the Sierras, Cascades, and Rocky Mountains. Don't be that person that wrangles their buddies for an epic trip to the Rockies or Eastern Sierra, only to discover your route is impassable due to snow. In fact, we always recommend checking the Snow Depth Layer prior to heading out to any higher elevation routes/trails, especially if it's earlier, or later in the season when the risk of impassable snowdrifts is higher.

Similar to to the Wildfire Layer, the Snow Depth Layer also relies on color coding, but the various colors correspond to different snowdepths. Lighter shades indicate shallower snow depths, while magenta to dark maroon indicate the deepest snow. Keep in mind, the snow depth layer is an approximation, but it should give you a sense where the deeper snow is. Generally speaking, we've found that when the hue trends towards dark blue, snowdepths become too deep for a typical 4x4 vehicle without specialized equipment (oversize balloon tires or cat tracks) to pass through.
About the NOAA Snow Depth Layer The Snow Depth Layer is updated every 24 hours by the NOAA (Gaia also updates the overlay every 24 hours), and is sourced from National Weather Service's National Operational Hydrologic Remote Sensing Center (NOHRSC) Snow Data Assimilation System (SNODAS).
Mines and Mineral Resources If you've ever explored the backroads and trails of the Sierra, the deserts, or the Rockies, there's a good chance you explored an old ghost town or mining camp along the way. The West is filled with literally
tens of thousands of old mines and prospects. Some still retain their impressive structures built by miners who've since passed to the spirit world, while other sites are indicative of minor prospecting activity. It's fun to explore these old sites, and learn more about them. Our go-to layer when it comes to rock hounding and mine hunting is Gaia's Mines and Mineral Resources overlay. First things first, this layer is definitely hit or miss. We've discovered some awesome sites, but many sites have also been major let downs, so just keep that in mind. We've had our best success when utilizing this layer with other resources, and doing a bit of research in advance. If you can see structures and mine activity (an open pit, tailings) from Google Earth, this is typically a strong indicator that a site is worth visiting. Don't see much in Google Earth, that'll likely be the case if you visit the location in person-- but certainly not guaranteed, as mine shafts can be difficult to spot from satellite imagery. There's also a ton of resources online that provide invaluable information about specific mining districts and mines. But we've also had our fair share of surprises thanks to the Mines and Mineral Resources Layer.
We love the rich information that Gaia provides with this layer, including the various commodities/minerals that were mined, the mine's name, reporter and reference, and often times a USGS link is provided that has even more details about the corresponding mine or prospecting site.


Comments